Showing posts with label altered art. Show all posts

Monday, 1 August 2011

Card and Present

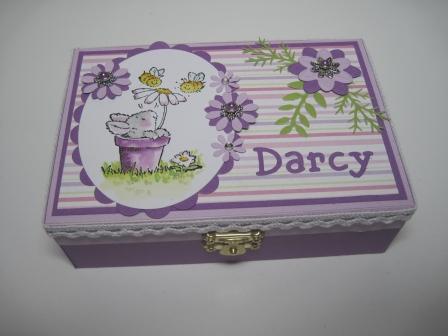
I made this card and altered box for my daughter's friend Darcy who has just turned 8. They are designed using the info I got from her which was she like pink and purple and her favourite animal is rabbits.  

For the card I used a Penny Black Stamp which I coloured with Twinkling H2Os

The sentiment and flowers are all done with Go Kreate Dies and the leaves are a paper punch.

The box is made using the same things as the card but I also added some lace ribbon around the edge of the box just to finish it off.


Tuesday, 28 December 2010

Altered CD

I made this altered CD hanger for my friend's little girl for her Birthday.
The image is a Sugar Nellie coloured with Twinkling H2Os. The papers and butterflies are from a set by D.V.W.C. The flowers are a daisy punch and the leaves are a variety of die cuts that I made with my Cuttlebug and then added Stickles the the edges.
I've been told it now has pride of place on her wall in her bedroom.

Saturday, 10 July 2010

Penny Black Saturday Challenge

This week the Penny Black Saturday Challenge is a sketch challenge.

I thought I'd use the sketch to make a thank you card for my daughter's teacher.

I used papers by K&Co. The bottom piece I have scalloped the edge like in the sketch but you can't see it very well in the photo as the tag and the image cover most of it but the tag is free swinging so you can see it in real life when it moves.

The image is a Penny Black coloured with Twinkling H2Os. The oval and circle were cut using Nestabilites Dies in my Cuttlebug.

I swapped the text and the flowers places round from the sketch to make it work for my card but I'm pleased with the result. Hope Ellie's teacher likes it too.

I've now finished the tin to go with it. It started life looking like this.


And now it looks like this.

And this is the card and the tin together.

I bought some fudge and toffees from Thorntons to go in the tin - hope they last until Friday without me eating them!

Sunday, 20 December 2009

Altered Art

Josh was asked to take part in a Secret Santa at school. He had to buy a gift for a boy called Tom for no more than £2 and bring it in wrapped up with Tom's name on it. We decided to buy a gift card and rather than just send it in in an envelope I thought I'd alter this empty Dove gift box and send it in in this instead.

It started off looking like this... and ended up looking like this...
The papers are by Basic Grey, I love the distress look of them and are lovely to work with. The ribbon I think is by Dovecraft but I might be wrong. The "Happy Christmas" is a Go Kreate Die used in my Cuttlebug and the letters for "Tom" are Quickutz Moxie alphabet dies also used in my Cuttlebug. When we'd put the Gift card in it I tied some red foil ribbon around it to stop the lid coming off in transit to school. I hope Tom liked it!

Tuesday, 21 July 2009

Teachers Gifts

I was looking through my "stuff for altering" stash and found I still had a couple of these paper pad sets left from last year so I thought I'd alter one as a Thank You gift for Josh's 1 to 1.

This is the raw version.

And this is it decorated. The paper and tag are from a set by Hot Off The Press. The wording I did using a Quickutz Die in my Cuttlebug. I added a couple of flowers and a velvet brad to finish.

This is the raw inside.
and this is it after I finished altering it.

Josh's class teacher is actually leaving to have a baby so I had the idea to make her a baby tin. They start off looking like this.
and this one ended up looking like this!
I used papers by Dovecraft and a gorgeous Magnolia stamp that belongs to my mum. The ribbons are a selection from my stash, I know the green spotty one is by Blonde Moments but the others I have no idea!
The only problem with the paint tins is that they aren't very big and trying to find baby things small enough to put in them is not as easy as you would think. They are probably better being used to put handmade biscuits or small chocolates or treats in. Oh well you live and learn!

Tuesday, 14 July 2009

Altered Paint Tin

My daughter's teacher is retiring on Friday. I thought I'd make her a Retirement kit using one of the paint tins I ordered.


I started by covering the lower part of the tin with paper by Hot Off The Press.


Then covered the top of the paper with co-ordinating ribbon.


I used adhesive letters by K&Co to spell out "Retirement Kit" around the top part of the tin. Although it looks really wonky on this photo?! Hmmmm.


When my mum came over last week I asked her if she would bring over her "old lady" stamps, so that I could stamp some out to use on this project. I cut round a few of the images and coloured them with Twinkling H2Os. Then used them to decorate the bottom half of the paint tin.


I added a few ribbons to the handle to finish.

For the lid, I used my Cuttlebug and Nestabilites to cut a circle from co-ordinating paper. Then used another of Mum's Old Ladies to finish. Stamps: Old Ladies Borrowed From Mum
Coloured With: Twinkling H2O's
Paper: Hot Off The Press
Adhesive Letters: K&Co
Embellishments: Ribbons
Equipment: Cuttlebug ~ Nestabilities

I just need to make the card to go with it now.

Monday, 9 March 2009

Colour Create Challenge

This weeks Colour Create Challenge is to use the colours orange, yellow and green with the optional extra being to make something that is NOT a card!

So here is my Easter Sour Cream Carton filled with yummy Cadbury's Mini Eggs. Will it stay like this until Easter?! Hmmmmm! I embossed the yellow card with the Birds and Swirls Cuttlebug embossing folder before rolling it into the Sour Cream Carton shape. I know the birds aren't chicks but I still think it works?!


This is a close up of the tag. The stamp is a Penny Black and the circles were all done with those fabulous Nestabilites. However did I craft without them?!! :-)
The last photo I took so that you could see the full shape of the Sour Cream Carton without the tag in the way. I tied the tag to one end of the orange ribbon so that it would just swing freely.
Stamp: Penny Black
Coloured with: Twinkling H2Os
Papers: Colorbok
Ribbons: Blonde Moments
Equipment: Cuttlebug ~ Embossing folder ~ Nestabilities ~ Cropodile

Wednesday, 4 March 2009

Altered Box

Can I just start by saying what a beautiful day it is today. It is gorgeous out there today. We have clear blue skies and sunshine, it's very cold, but the sun is shining so I don't care! I took Max out for his morning walk and there are Snowdrops and Crocus' everywhere and even the Daffodils are getting ready to come out. Spring is springing! Isn't it lovely?!

Ok, onto my crafty stuff for today. My daughter's friend Freya (whose birthday party is on Saturday) said she likes "Hello Kitty" stuff. So I scoured the Internet and found a little stamp set and a keyring that I thought she could clip to her book bag anyway when they turned up they were tiny and didn't look much like a present at all. So I managed to find a few other Hello Kitty bits and pieces and then I thought I'd decorate a box and make it very girly and pretty and then I could pop all the little gifts in that and make it look like one big nice one.

This is what the box started out like. I covered the top and the sides in pink and lilac papers, added a lilac ribbon around the bottom half and then fixed a white bow over the join. I used a Sugar Nellie image for the top which I coloured with Twinkling H20s and then used lots of flowers and leaves to decorate it.
This is a better view of the lid.
I have entered it into the Trimcraft competition as a Mother's Day creation. I said it was ready to fill with yummy pamper treats for Mum. Hope Mum hasn't read it yet! :-) Well it could have been used for Mother's Day if it wasn't already being used for Freya's Birthday present. Shhhhh don't tell them!!

Tuesday, 9 December 2008

Chipboard Baby Album

I am feeling so tired today. I feel asleep this afternoon, luckily Maxy puppy woke me up by jumping on me when the alarm went off on my phone to tell me it was time to go get the kids from school. What a good puppy. I'm still feeling sleepy now though and I'm just hoping I'm not coming down with Peej's Flu bug and I'm tired because my body is trying to fight it off. Fingers crossed eh?!

Just over a week ago a friend of mine asked me if I could make a gift for a friend of hers that had just had a baby. Because she needed to send it to America I suggested making a baby album.

I can't show the front page as I used the birth announcement which has a photo and the families details on it so it wouldn't be right. However I can show you the rest.

These are the first two pages. All the papers I've used are by Dovecraft and I decoupaged some of the characters to give it some depth and interest. I just love these little elephants.
On this one the silicone glue I used started to show through the paper so I used a flower on the bed cover and another small star on the balloon to cover it up. Shhhh don't tell anyone!
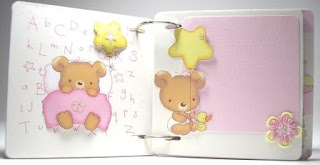
These papers are so fun to work with and I have to say even though it took days to make I really enjoyed making this.

These little hippos are so girly. They remind me of Fantasia.

This little lamb with the duck is just so cute.

These are the "Fairy girl" pages

The last two pages I did as Christmas pages and thought I'd leave two spaces for photos.
On the back I made a vellum envelope and a tag with a ribbon so that my friend could write a little message to send with it.
It's the first time I've really made something like this. I have done a mini album for my mum before but I had photos to work with. It's much more difficult just leaving a space and hoping that a photo will fit in it. I am really pleased with the result though and my friend loved it too which is always good!
I apologize for the photos not being very good, I had to take them in a rush and the lighting was less that ideal but hopefully you can see enough to get the idea.

Tuesday, 18 November 2008

Altered Box

I bought this "Diamond" as a kind of secret Santa gift for a game that we play on the last Bunco before Christmas. Unfortunately the diamond came in a really naff, plastic, see through box. I thought I would give it a nicer home to live in so that it would look more sophisticated instead of naff.

The photo doesn't do it justice as the light in the conservatory was really bad when I took it and so on here it looks like the diamond is a bit yellow whereas in the flesh it is really white and shiny. I used one of my brown boxes and some gorgeous paper by Hot Off the Press. I used brown Distress Ink around the edges of all the pieces before I stuck them onto the box so that they would have the same rustic feel as the box.

I then wrapped the box in some cream ribbon and added the flowers to finish.
I have made another box to put the box in as a joke but that one isn't quite finished yet.

Saturday, 11 October 2008

Raspberry Ribbons Sketch Challenge Four

Whoops. I was supposed to put this on last weekend. Oh well its on now and you still have a week left if you'd like to join in too? This is this fortnights sketch on Raspberry Ribbons.And this is my D.T. example for it. I made a door hanger using an old CD. The ribbon on it is a lovely velvet ribbon and feels lovely. Very tactile!

Tuesday, 22 July 2008

Teacher's Gifts

This is the portable Post-it pad that I made for Ellie's teacher. I made up a little story (below) to go in the card to go with it. Now my hubby thought I was nuts for the story bit but my mum and one of the mum's I showed it to both thought it was nice. I will let you be your own judge!
>Once upon a time there was a reception class teacher called Miss Keane. One day Miss Keane decided that she would take her class to Stapeley Water Gardens for the day.

Towards the end of the class trip Miss Keane said to some of the mummy helpers “The children have been coming out with some wonderful things. It’s at times like this I wish I had a post-it pad that I could wear round my neck so that I could write them all down!”

Little did Miss Keane know that a tiny water fairy, who was dipping her feet in the fish pool next to where Miss Keane was standing, was listening to every word she said.

The water fairy decided to follow Miss Keane around to see if she was a teacher worthy of having a wish come true. Well, the tiny fairy didn’t need to follow her for very long to realise that Miss Keane was a very special teacher who was very kind to the children in her care and who seemed to have a special place in her heart for each and every one of them.

The water fairy said “I will make Miss Keane’s wish come true and she can have it as a gift from the children at the end of the school year then she will know that all the children have a special place in their hearts for her too.”


I was then asked to make two tins one for the class teacher and one for the teaching assistant. All the children were then given two cards and asked to write and/or draw a message for Miss Keane and Mrs Roberts on them and these then went in the tins. It was a fab idea so how could I refuse. These are the tins I did. The papers on both the tins are by Daisy Bucket Designs and the lettering was done with my Quickutz.
And then because I'd made something for Miss Keane but nothing for Mrs Roberts I bought some small boxes of chocolates and made a sleeve to go over each one and then made a matching card to go with it. They also have little tags with a hand written message from Ellie on too but they are tucked in the top of the chocolates.The papers on these are from K&Co and the writing was done on my Cricut .